

- General Top
- SEMICONDUCTOR
- STORAGE
- COMPANY
-
My ToshibaSemicon
- Semiconductor Top
-
ApplicationsAutomotive
Body Electronics
xEV
In-Vehicle Infotainment
Advanced Driver-Assistance Systems (ADAS)
Chassis
IndustrialInfrastructure
BEMS/HEMS
Factory Automation
Commercial Equipment
Consumer/PersonalIoT Equipment
Healthcare
Wearable Device
Mobile
Computer Peripherals
-
ProductsAutomotive Devices
Discrete Semiconductor
Diodes
Transistors
Logic ICs
Analog Devices
- Automotive SmartMCD™ (Integreted SoC Conbining Microcontroller and Driver)
- Automotive Brushless Motor Driver ICs
- Automotive Brushed DC Motor Driver ICs
- Automotive Stepping Motor Driver ICs
- Automotive Driver ICs
- Automotive System Power Supplies ICs
- Automotive audio power amplifier ICs
- Automotive Network Communication
Digital Devices
Wireless Devices
※
 : Products list (parametric search)Power Semiconductors
SiC Power Devices
※
: Products list (parametric search)Isolators/Solid State RelaysPhotocouplers
Digital Isolators
Solid State Relays
Fiber Optic Transmitting Modules
※
: Products list (parametric search)MOSFETsIGBTs/IEGTsBipolar Transistors※
: Products list (parametric search)Diodes※
: Products list (parametric search)MicrocontrollersMotor Driver ICsIntelligent Power ICs※
: Products list (parametric search)Power Management ICsLinear ICs※
: Products list (parametric search)General Purpose Logic ICsLinear Image SensorsOther Product ICsOther Product ICs
※
: Products list (parametric search) -
Design & Development
-
Knowledge
- Where To Buy



- Part Number & Keyword Search
- Cross Reference Search
- Parametric Search
- Stock Check & Purchase
This webpage doesn't work with Internet Explorer. Please use the latest version of Google Chrome, Microsoft Edge, Mozilla Firefox or Safari.
require 3 characters or more. Search for multiple part numbers fromhere.
The information presented in this cross reference is based on TOSHIBA's selection criteria and should be treated as a suggestion only. Please carefully review the latest versions of all relevant information on the TOSHIBA products, including without limitation data sheets and validate all operating parameters of the TOSHIBA products to ensure that the suggested TOSHIBA products are truly compatible with your design and application.Please note that this cross reference is based on TOSHIBA's estimate of compatibility with other manufacturers' products, based on other manufacturers' published data, at the time the data was collected.TOSHIBA is not responsible for any incorrect or incomplete information. Information is subject to change at any time without notice.
require 3 characters or more.
Register as a New Web Member
Get started with my ToshibaSemicon to enhance your workflow and access to technical information.
Simply follow the steps below to register.
Registration Method
The registration process is completed in four simple steps.

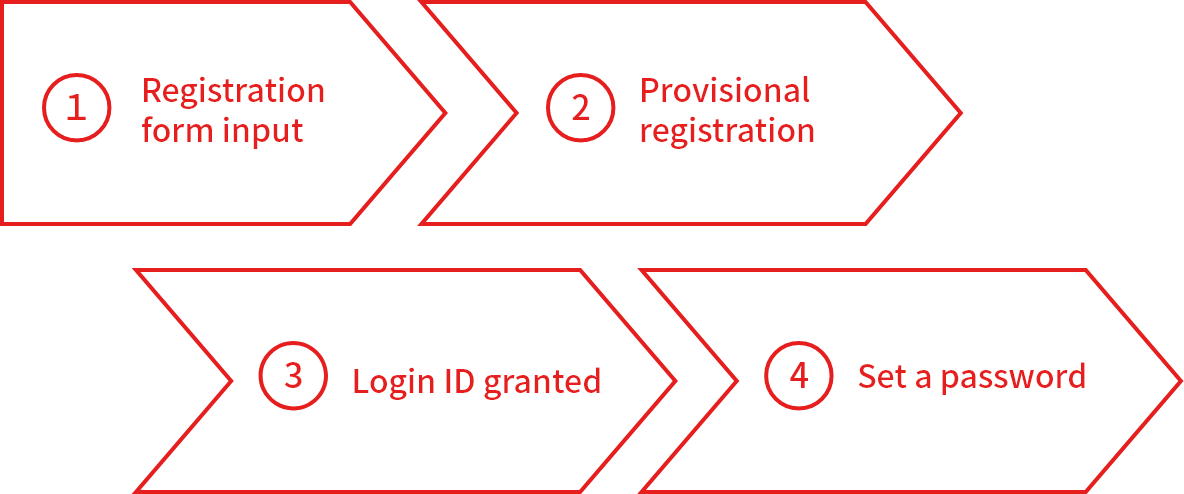
Step 1: Registration form input
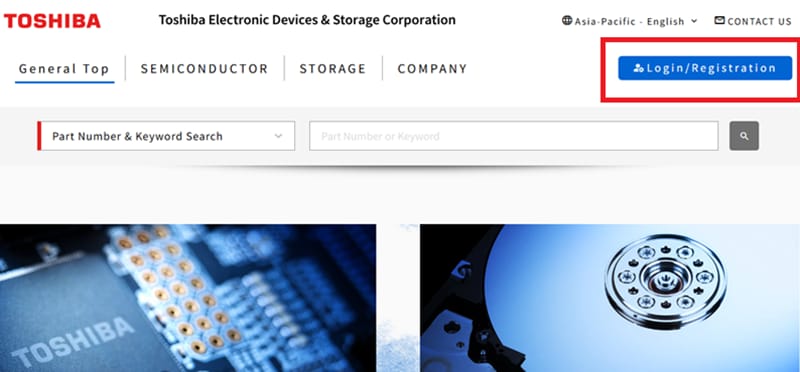
If you would like to register as a member, click [Login / Sign Up] at the top right of the page .
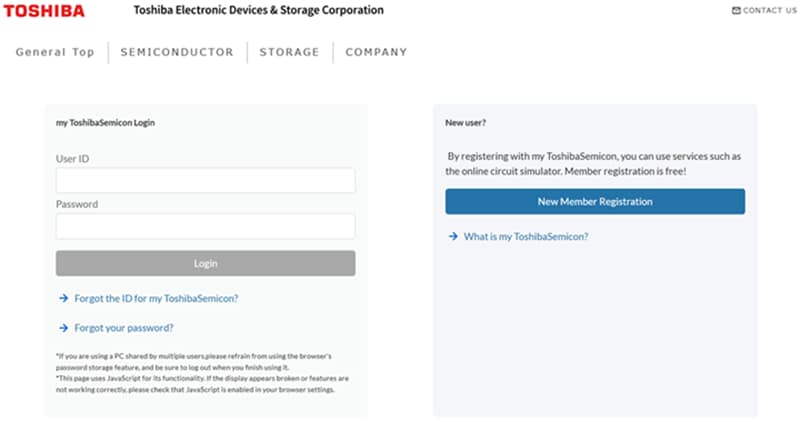
- New Member Registration
⇒ Proceed by selecting [New member registration form]
- Existing Members
⇒ Log in using your registered [my ToshibaSemicon Login]
- Forgot User ID
⇒ Click [my ToshibaSemicon ID confirmation] to recover your information.
- Forgot Password
⇒ Click [Password reset]to recover your password
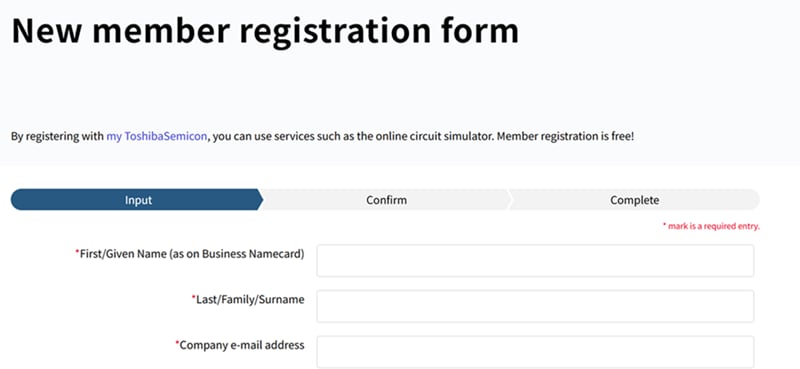
Please complete the required fields in the registration form and proceed with the free new member registration.
Follow the steps in the following order:
Input → Confirm → Complete
Step 2: Provisional registration
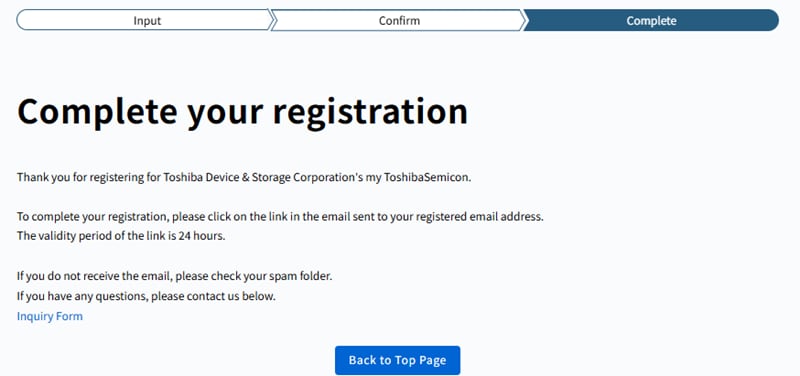
After submitting Step 1, the message "Complete your registration" will be displayed.
An email titled "my ToshibaSemicon provisional registration notification" will be sent to the email address you registered.
Note: If you did not receive the email, please refer to [I didn’t receive the registration or notification email].
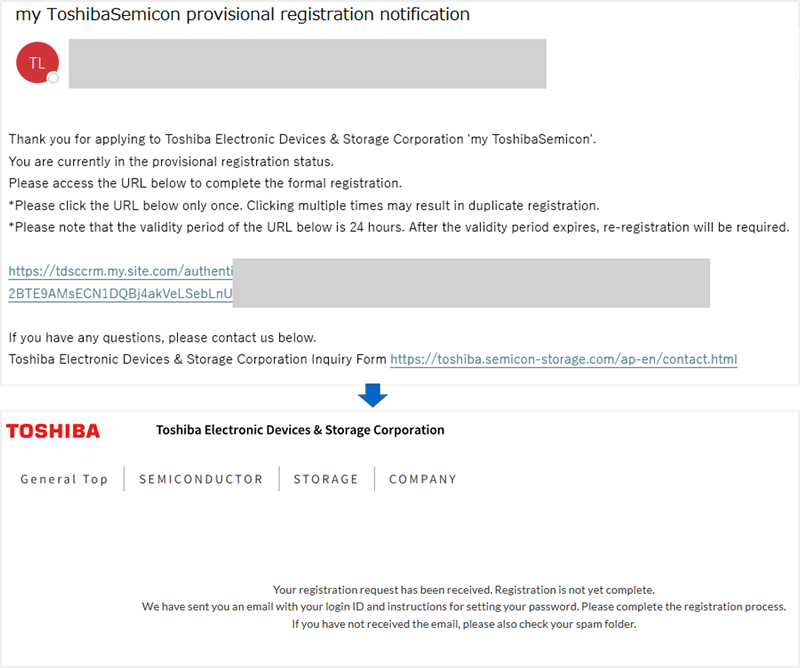
Click the registration URL provided in the email to complete your registration.
Note: The registration URL is valid for 24 hours. If the URL expires, you will need to submit a new registration request.
Please proceed to Step 3 to complete your registration.
Step 3: Login ID granted
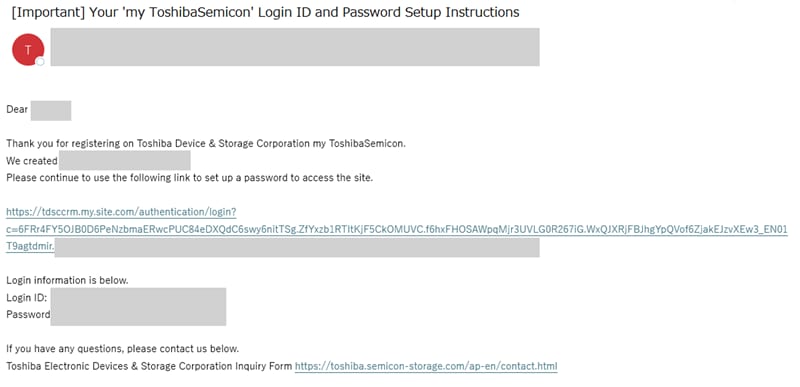
After completing Step 2, you will receive an email titled
"[Important]Your 'my ToshibaSemicon' Login ID and Password Setup Instructions".
This email contains your Login ID and a link to set up your password.
Use the link provided in the email to proceed to Step 4 and complete the password setup process.
Step 4: Set a password
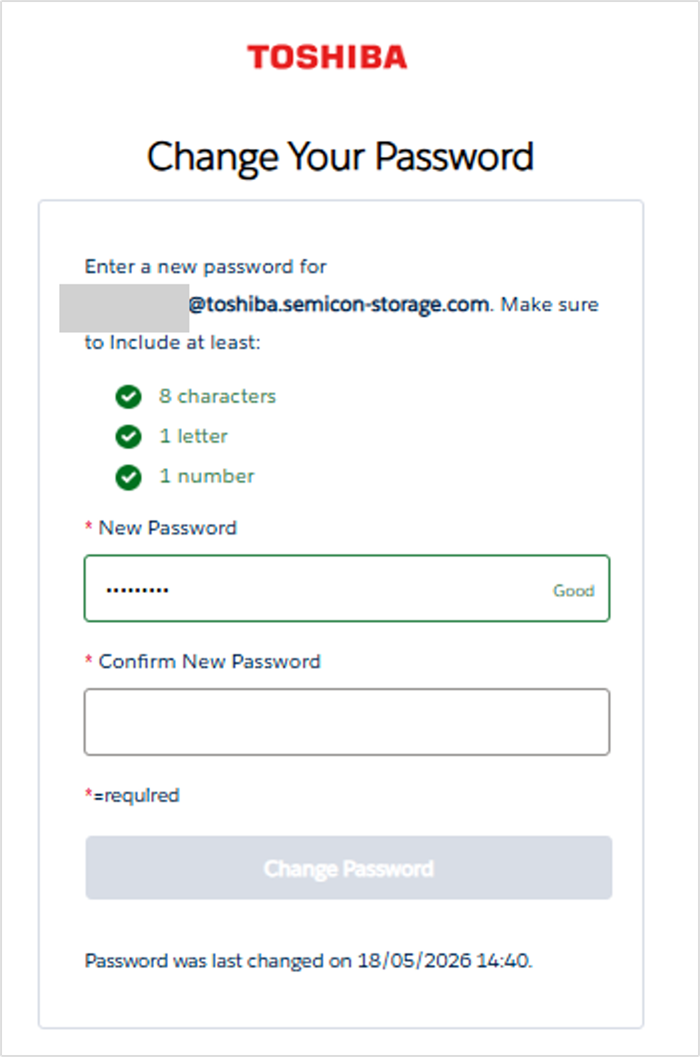
Check the email received in Step 3 and follow the link provided to continue the password setup process.
Enter your new password on the password setup page and complete the configuration.
Once your password has been successfully set, your registration is complete.